


How to Advertise on ChatGPT
ChatGPT now lets businesses advertise directly inside conversations — reaching users at the exact moment they're exploring options and making decisions.
OpenAI launched its Ads Manager Beta in 2026, giving advertisers a self-serve platform to run native, contextually relevant ads within ChatGPT responses. This guide walks you through every step of the setup process, from accessing the platform to getting your first campaign live — using real screenshots from the interface.
What is ChatGPT Advertising?

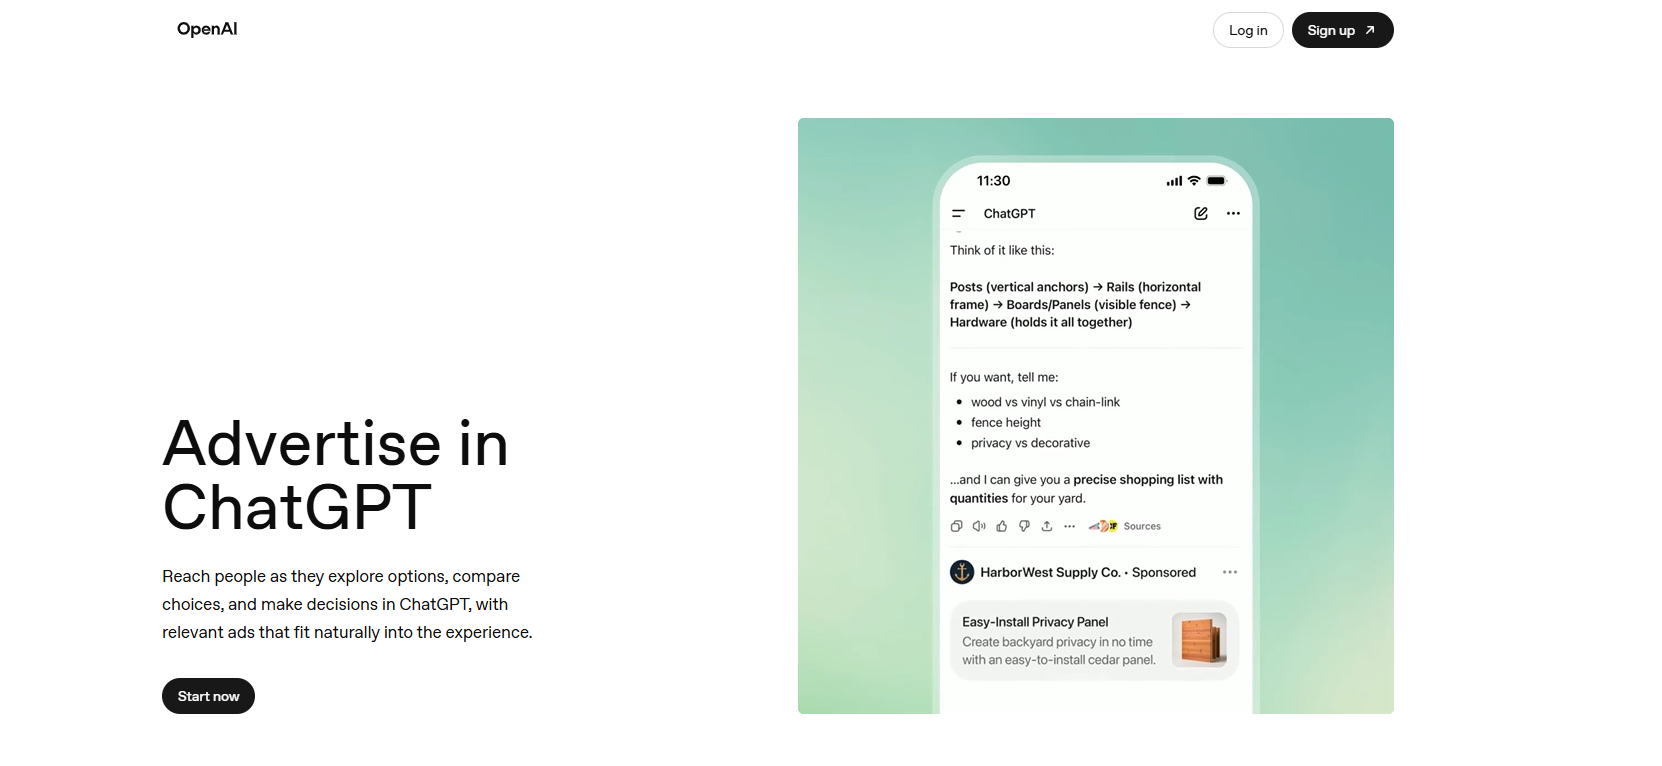
OpenAI's advertising platform lets businesses reach people as they explore options, compare choices, and make decisions inside ChatGPT. Unlike banner ads or search ads, these placements appear as native cards directly within the conversation — contextually matched to what the user is asking about.
In the screenshot above, you can see a real example: a user is asking about building a fence, and a relevant hardware supplier ad appears after ChatGPT's answer under a clear "Sponsored" label.
To get started, visit ads.openai.com and click Start now. You'll need an OpenAI account to proceed.
Accessing Ads Manager Beta

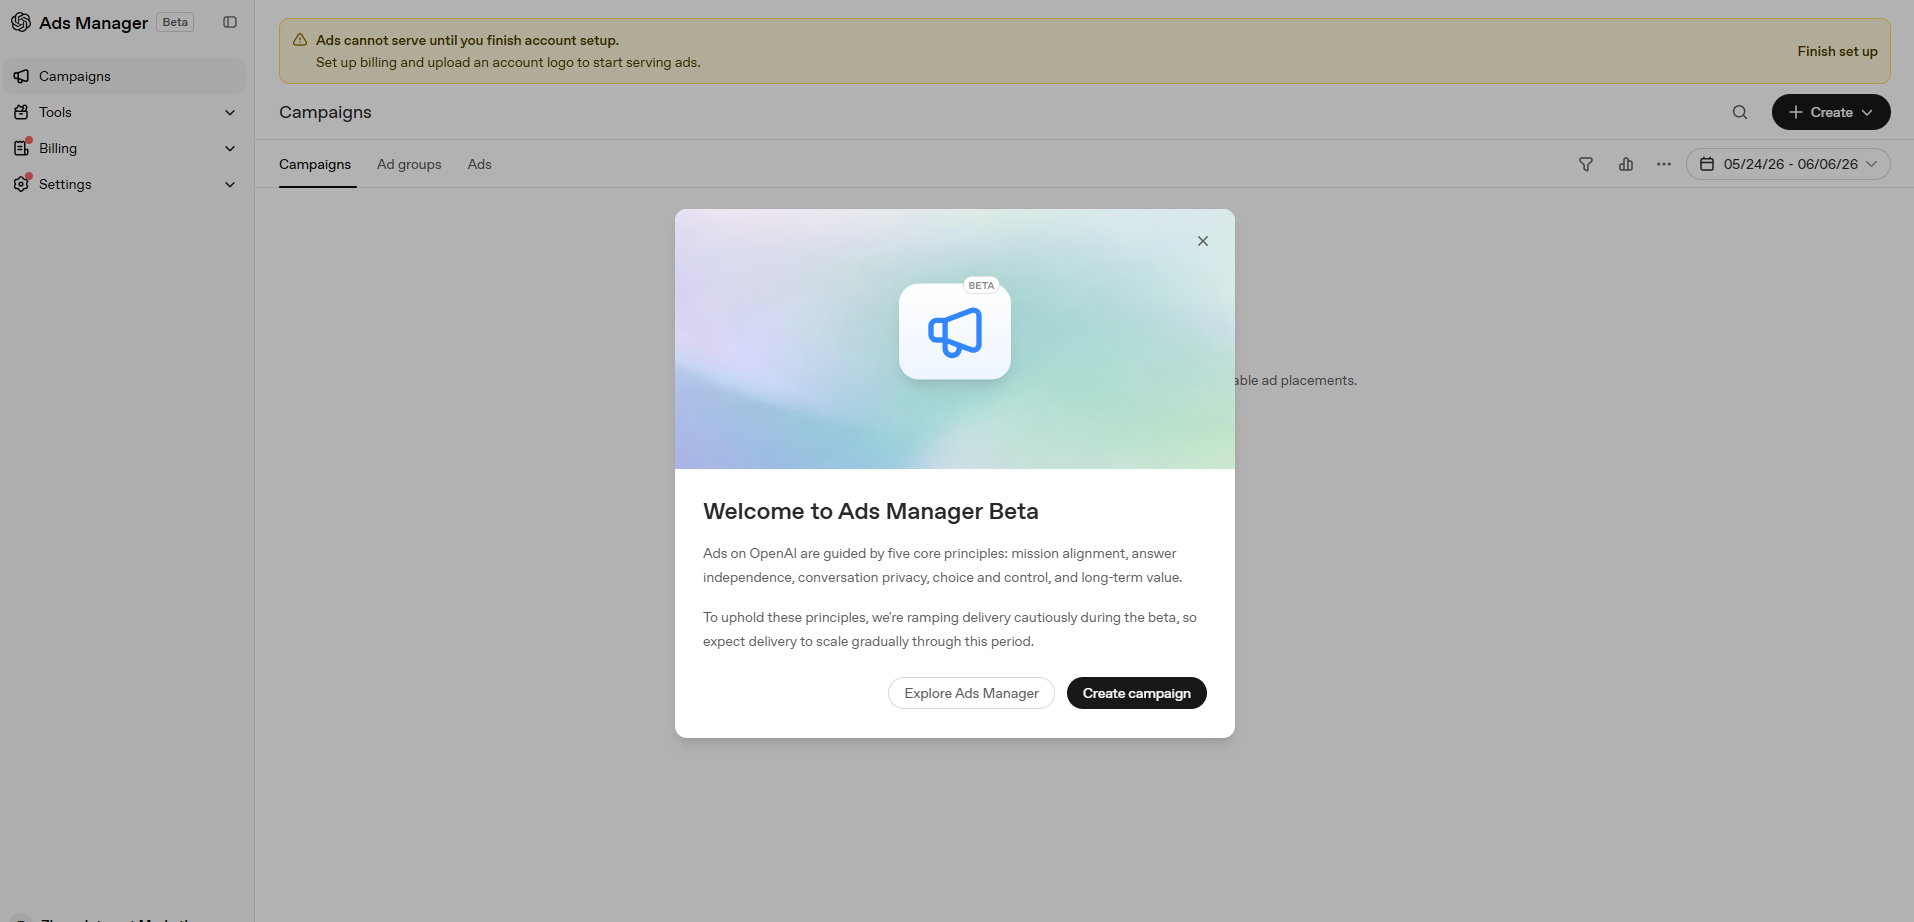
After signing in, you'll be greeted by the Ads Manager Beta welcome modal. OpenAI outlines five core principles governing how ads work on its platform:
- Mission alignment — ads must align with OpenAI's values
- Answer independence — ads never influence ChatGPT's answers
- Conversation privacy — user conversations remain private
- Choice and control — users can opt out
- Long-term value — sustainable, trust-first advertising
Click Create campaign to continue, or Explore Ads Manager to browse around first.
The Campaign Dashboard

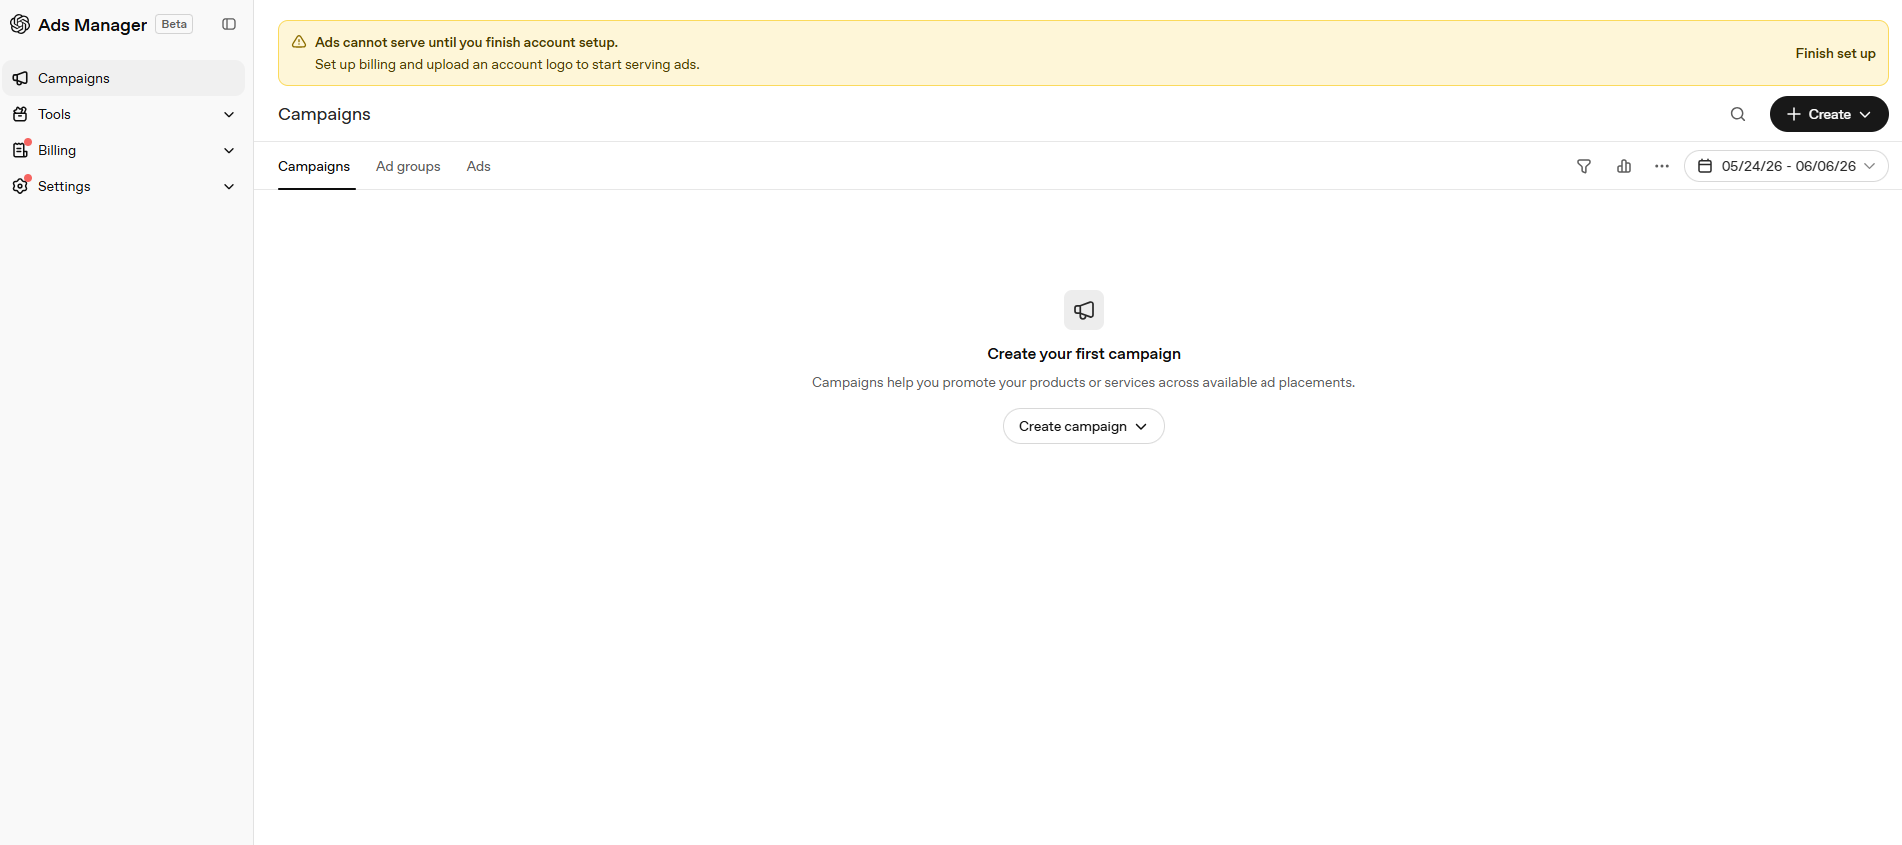
The main dashboard has three tabs: Campaigns, Ad groups, and Ads. The left sidebar provides access to Campaigns, Tools, Billing, and Settings.
The dashboard will eventually show performance columns including: Impressions, Clicks, Conversions, Spend, CTR, and Avg CPC. Until your first campaign is created, you'll see the empty state shown above.
Click Create campaign (or the + Create button in the top right) to begin.
Creating Your First Campaign
The campaign creation flow is a 3-step wizard: Create Campaign → Create Ad Group & Ads → Review.

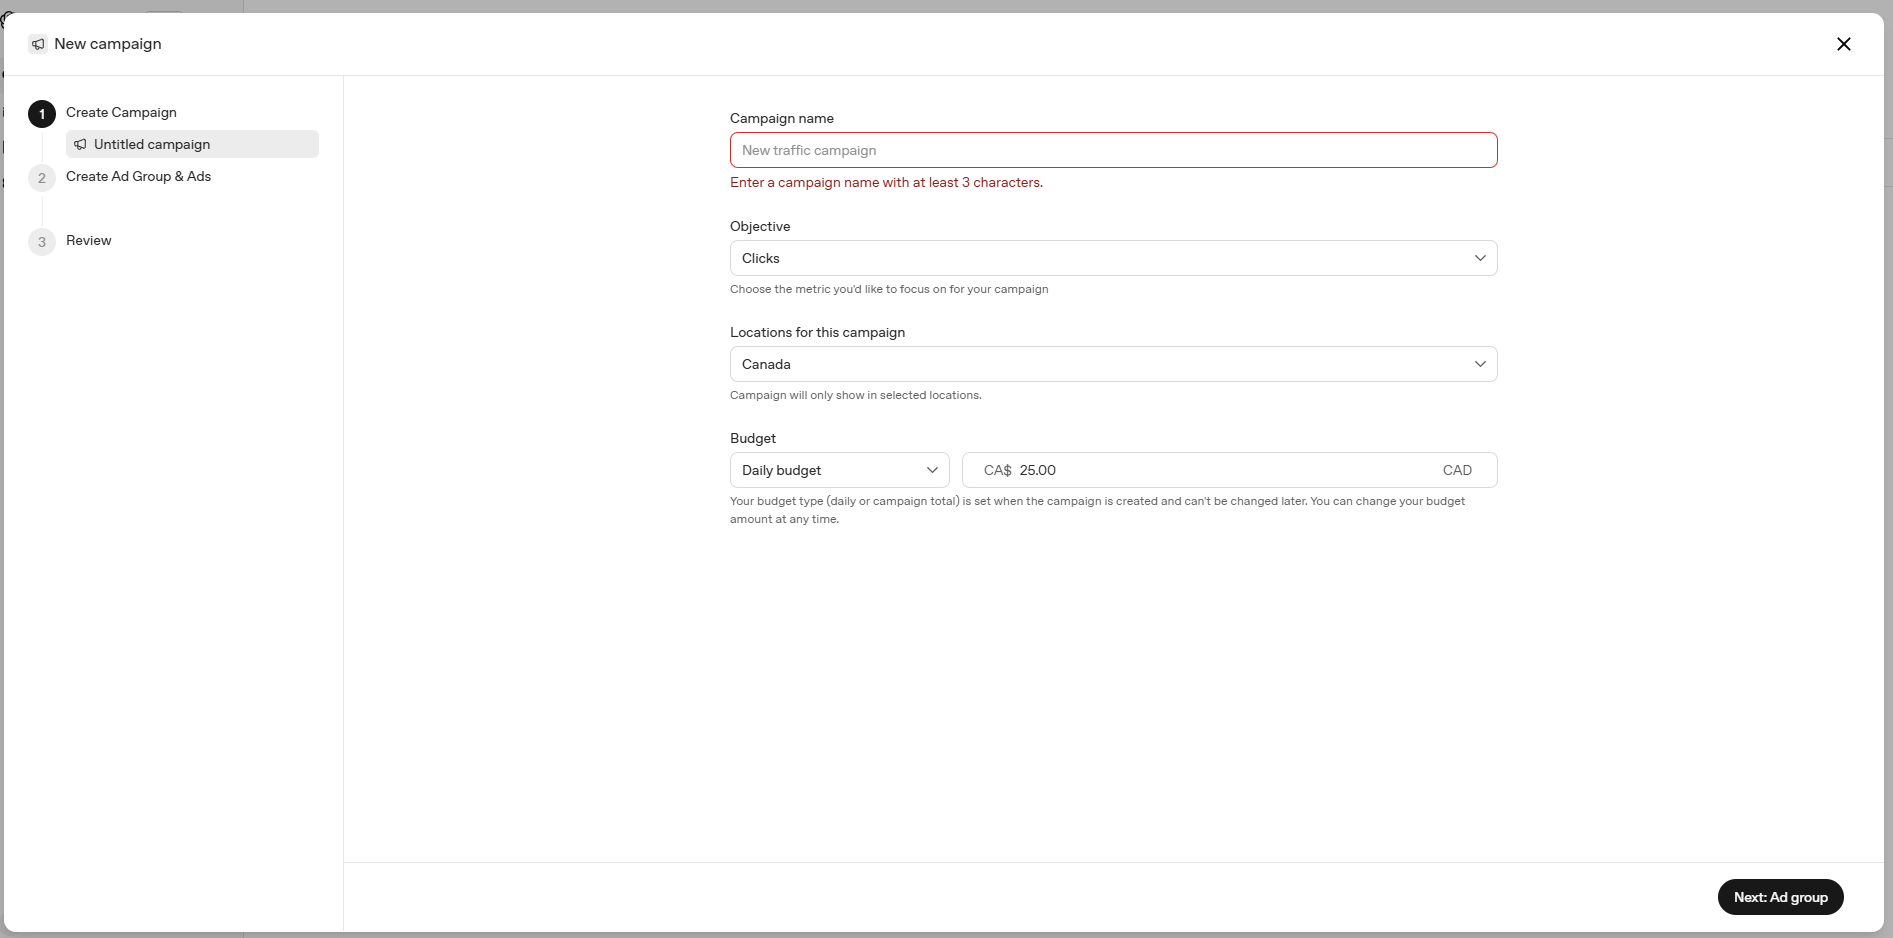
Fill in the following fields on Step 1:
| Field | Status | Details |
|---|---|---|
| Campaign name | Required | Min. 3 characters. No special characters. Use a naming convention that identifies the campaign clearly (e.g. Brand – Country – Type). |
| Objective | Required | Choose Clicks (CPC) or Views (CPM). Clicks is currently the most widely available option. |
| Locations | Required | Select countries where the campaign should show. Available options include US, CA, AU, NZ (and growing). Campaign will only serve in selected locations. |
| Budget type | Required | Daily budget or Lifetime budget. This cannot be changed after the campaign is created. You can update the amount at any time. |
| Budget amount | Required | Set in your account's currency (e.g. CA$). Minimum is CA$25/day. The example campaign uses CA$250/day. |

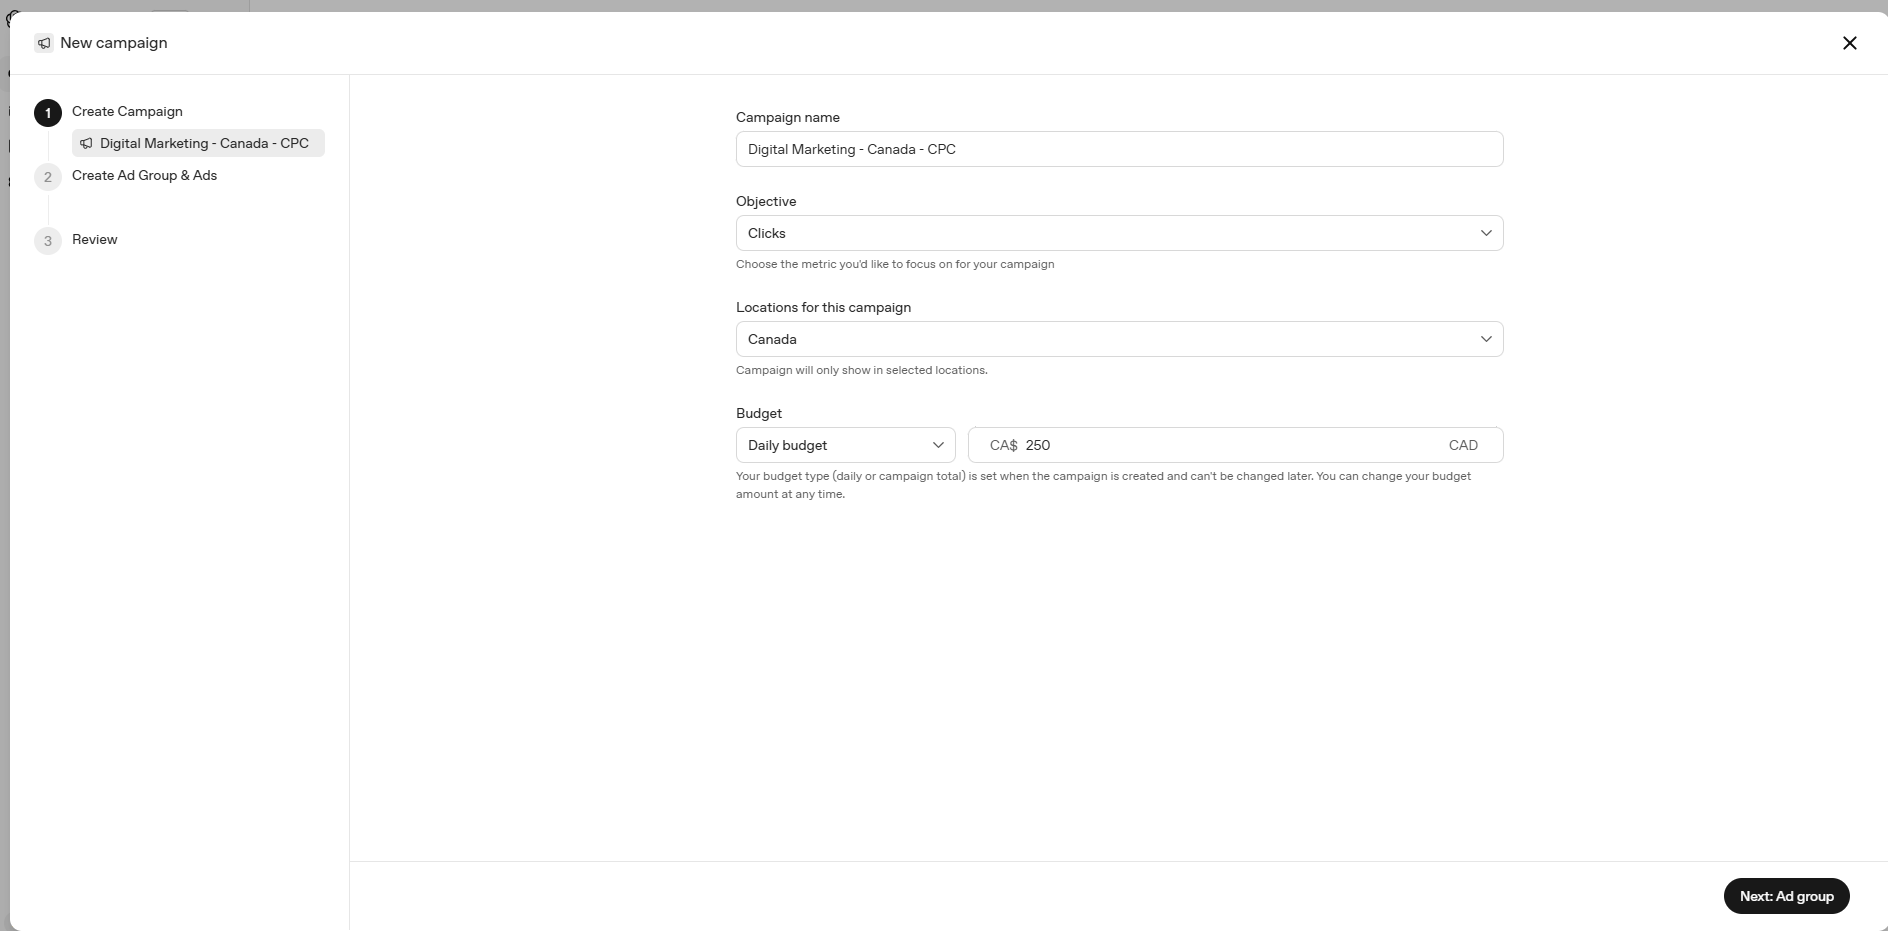
[Brand] – [Country] – [Objective] (e.g. Zigma – Canada – CPC) so campaigns are easy to identify at scale.
Once complete, click Next: Ad group to proceed to Step 2.
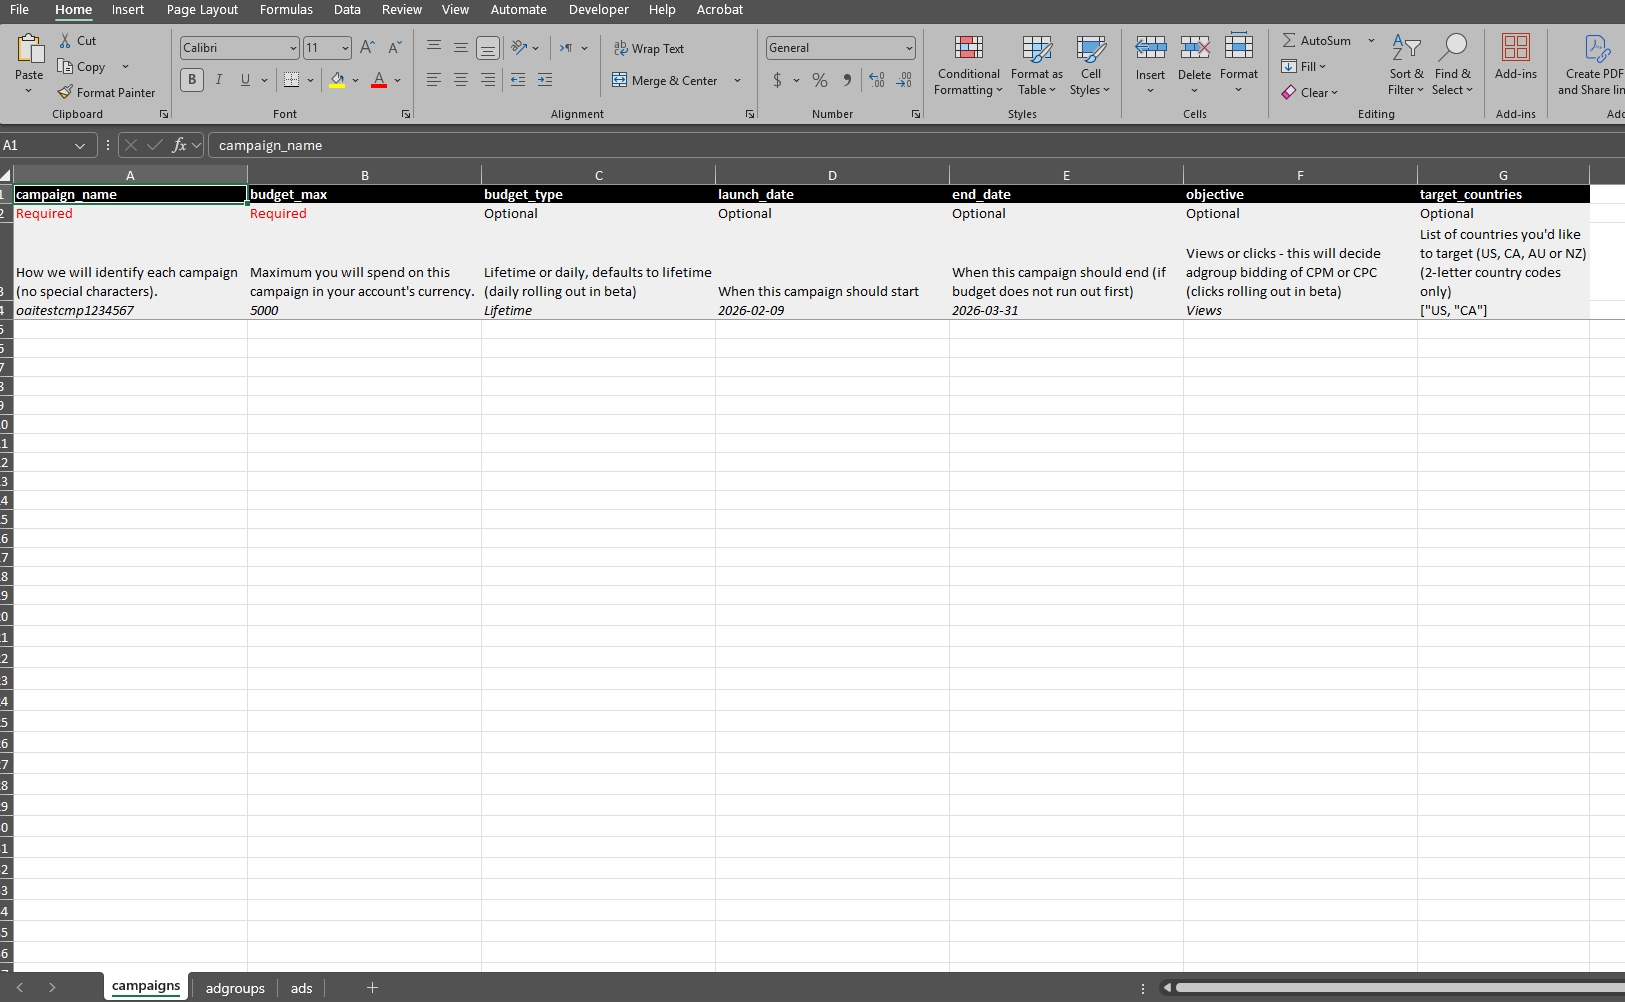
Understanding the Bulk Upload Sheets
OpenAI also provides a bulk upload template (downloadable Excel file) for advertisers who want to create multiple campaigns, ad groups, or ads at once. The template has three tabs: campaigns, adgroups, and ads.

Campaigns sheet columns:
| Column | Status | Notes |
|---|---|---|
| campaign_name | Required | No special characters. This is the unique ID for the campaign. |
| budget_max | Required | Maximum spend in account currency (e.g. 5000). |
| budget_type | Optional | Lifetime or daily. Defaults to Lifetime. |
| launch_date | Optional | YYYY-MM-DD format. |
| end_date | Optional | When campaign ends (if budget doesn't run out first). |
| objective | Optional | Views or Clicks (CPC rolling out in beta). |
| target_countries | Optional | JSON array, e.g. ["US", "CA"]. 2-letter codes only. |

Ad Groups sheet columns:
| Column | Status | Notes |
|---|---|---|
| campaign_name | Required | Must match the campaign_name from the campaigns sheet. |
| adgroup_name | Required | No special characters. |
| max_bid | Optional | Max CPC bid for click campaigns. (e.g. 3.00) |
| keywords | Optional | JSON array: ["test1", "test2", "test3"]. No limit on number of keywords. |

Ads sheet columns:
| Column | Status | Notes |
|---|---|---|
| adgroup_name | Required | Must match an adgroup_name from the adgroups sheet. |
| title | Required | Max 24 characters. |
| copy | Required | Max 48 characters (description text). |
| link | Required | Destination URL. Can include UTM parameters. |
| image_link | Recommended | Square image, min 640×640px, max 1200×1200px. PNG or JPG only. |
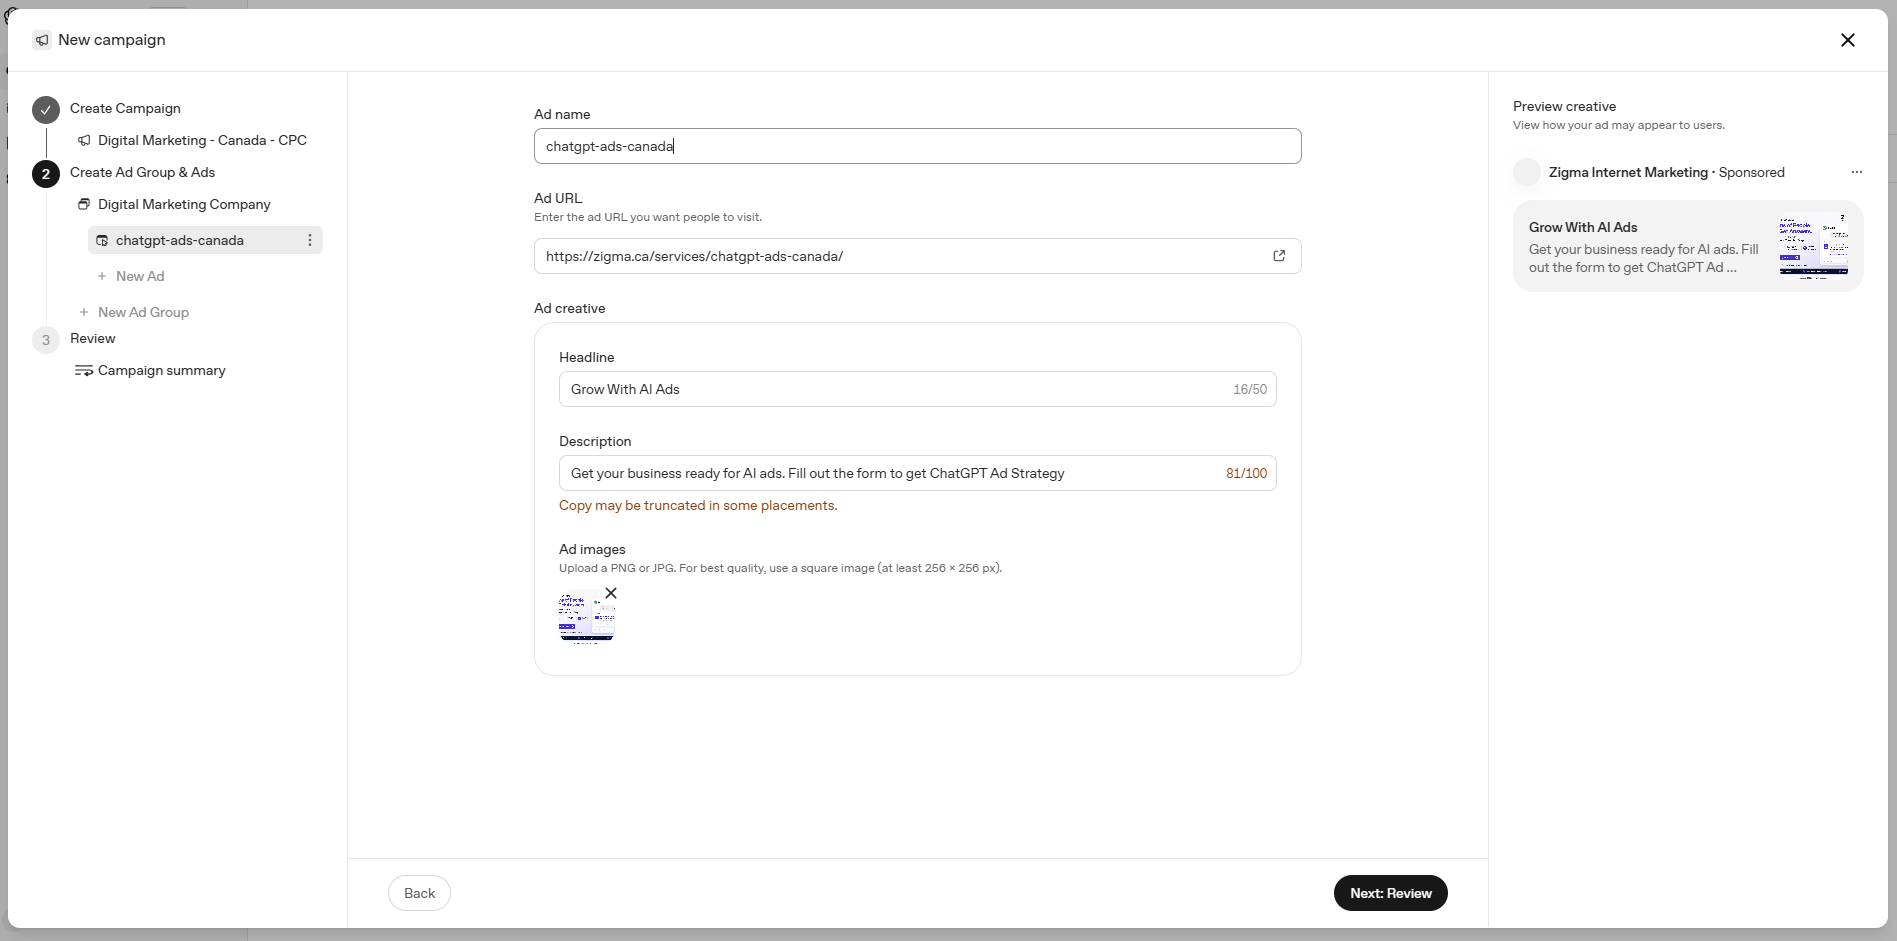
Setting Up Your Ad Group & Ad Creative
After completing Step 1 (campaign settings), you proceed to Step 2 where you define your Ad Group and Ad creative. This is where you write the actual ad that users will see.

The ad creation form includes:
| Field | Limit | Notes |
|---|---|---|
| Ad name | — | Internal reference only. Not visible to users. |
| Ad URL | — | The landing page users go to when they click. Can include UTMs. |
| Headline | 50 chars | The bold title shown in the ad card. Make it punchy and benefit-driven. |
| Description | 100 chars | Supporting copy. May be truncated in some placements — write the most important info first. |
| Ad image | Square | PNG or JPG. At least 256×256px, recommended 640×640px. Your logo or a product visual. |
The live preview on the right side of the screen shows exactly how your ad will appear — with your company name, the "Sponsored" label, headline, description, and image thumbnail.
You can add multiple ads per ad group by clicking + New Ad, and multiple ad groups per campaign via + New Ad Group.
Once satisfied, click Next: Review.
Reviewing & Launching Your Campaign

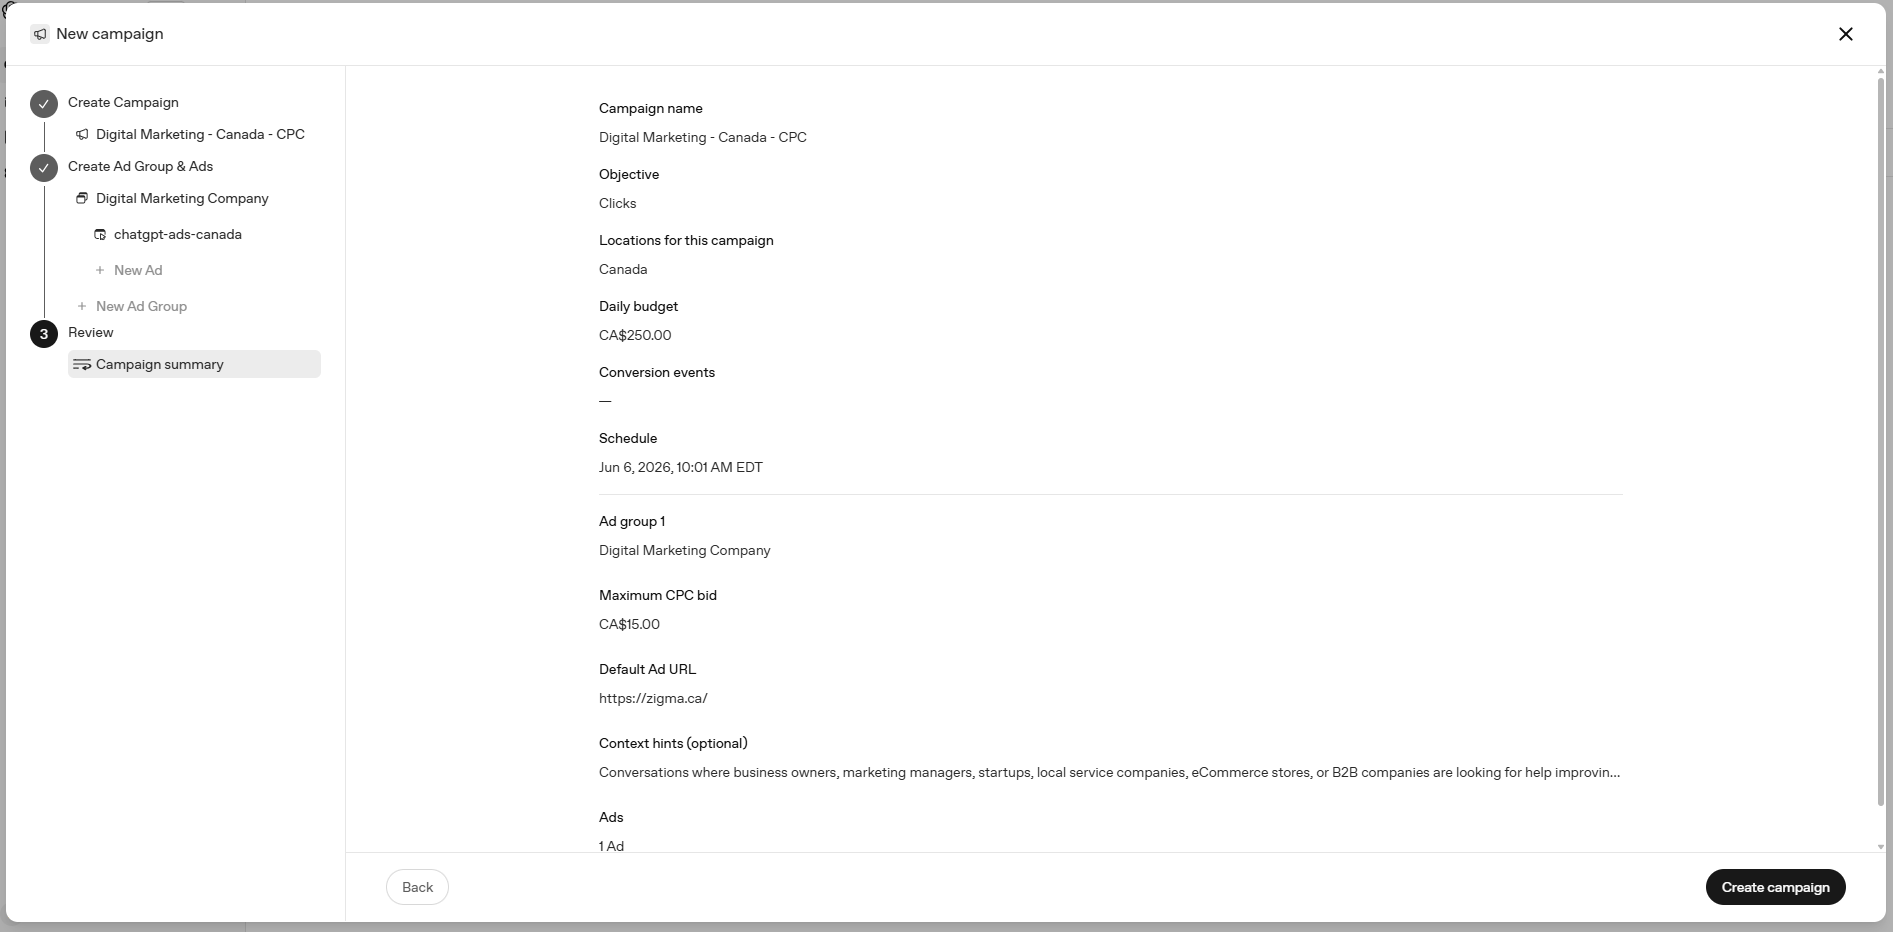
The review screen (Step 3) shows all your settings in one place:
- Campaign name, objective, location, daily budget
- Schedule — the start date/time (auto-set to now unless specified)
- Ad group name, max CPC bid, default ad URL
- Context hints — optional targeting signals about the types of conversations where your ad should appear
- Ads — count of ads attached
Review everything carefully, then click Create campaign in the bottom right.


After creating the campaign, you'll see it listed in the Campaigns dashboard. A prompt will appear asking you to complete account setup — which is required before ads can actually start serving.
Completing Account Setup (Billing & Logo)
Two things are required before your ads can start serving: billing setup and an account logo.

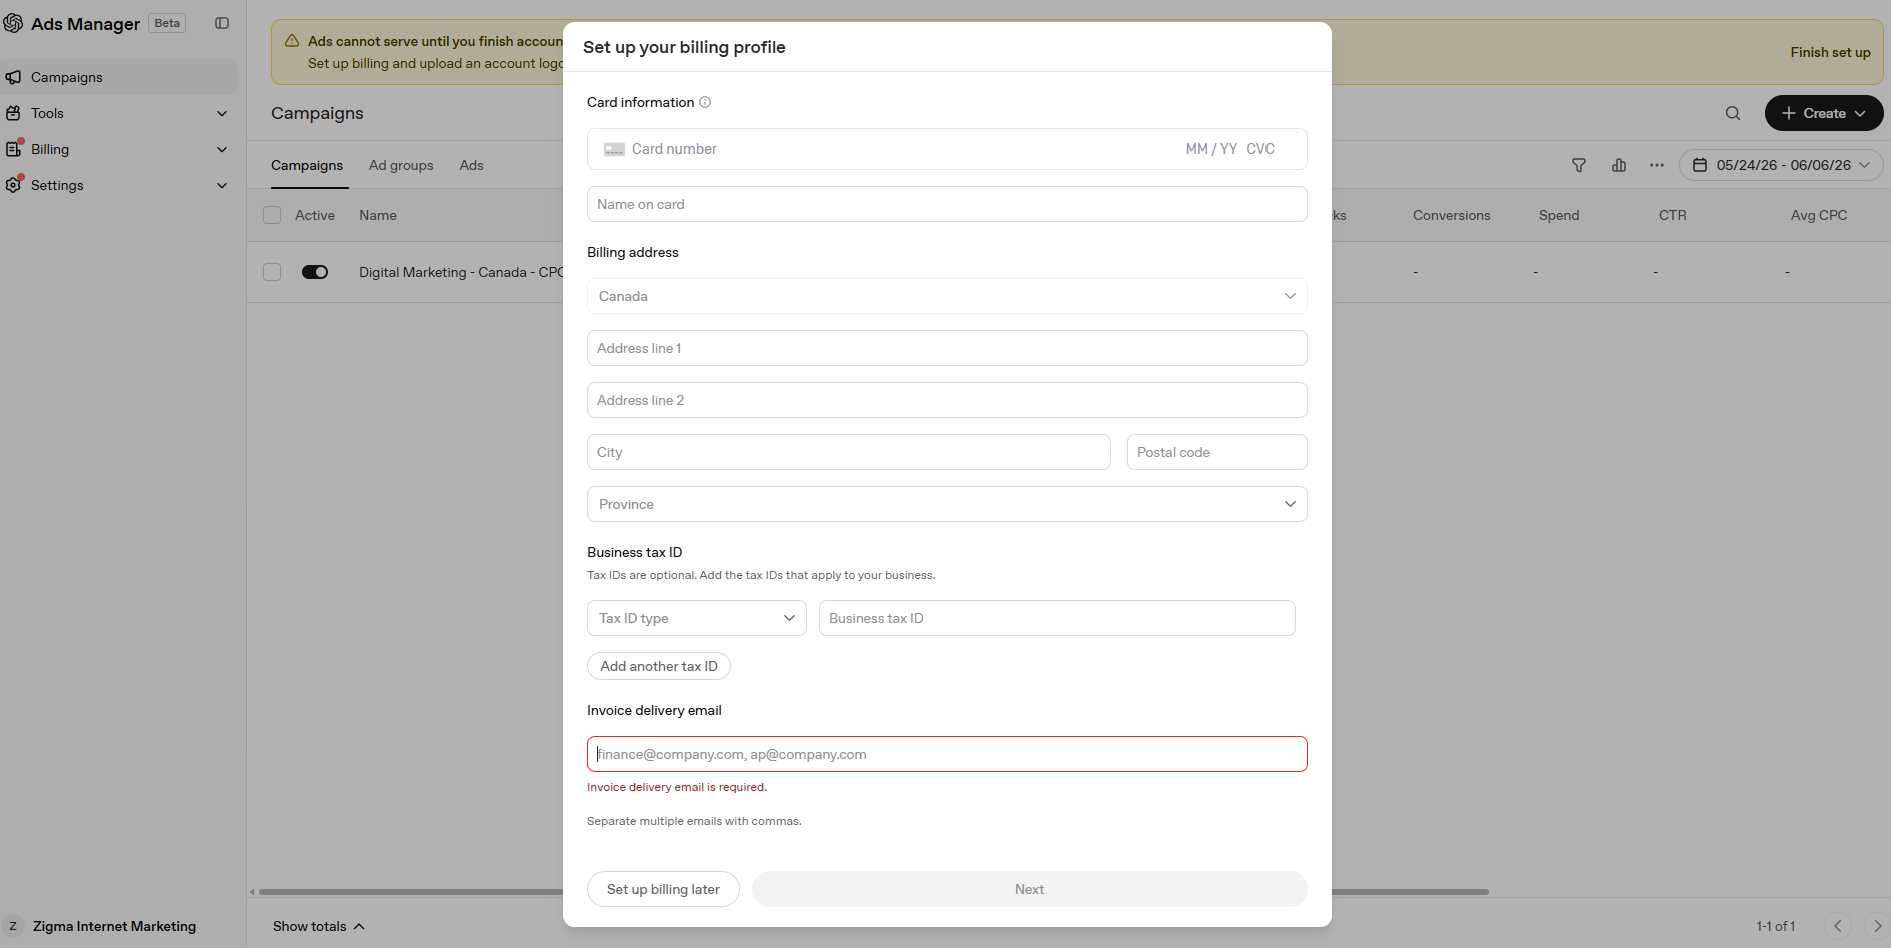
The billing setup form requires:
- Card number, expiry, and CVC
- Name on card
- Billing address (country, street, city, province/state, postal code)
- Business tax ID (optional — useful for tax purposes)
- Invoice delivery email (required — where billing statements will be sent)


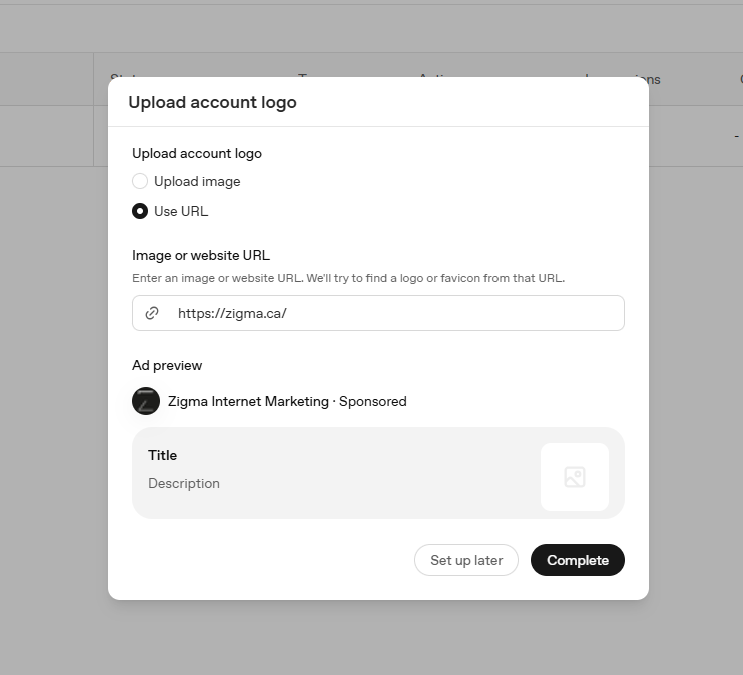
For the account logo, you have two options:
- Upload image — directly upload your logo file
- Use URL — enter your website URL and OpenAI will automatically find and use your logo or favicon
An ad preview is shown immediately so you can see how your company name and logo will appear in the "Sponsored" label on your ads.
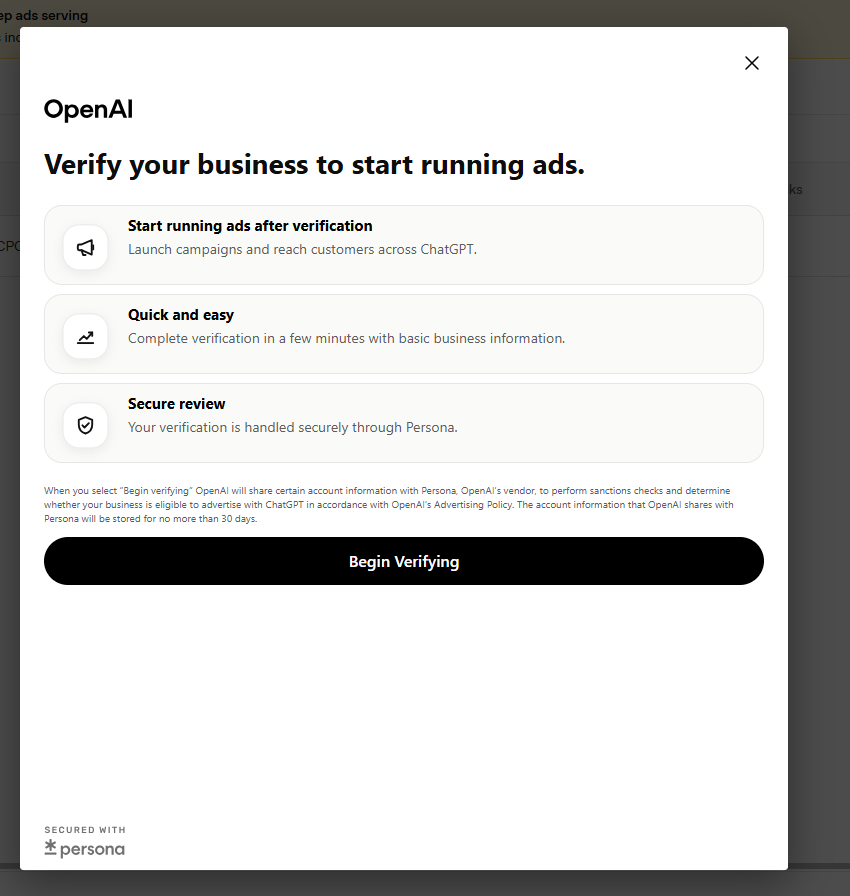
Business Verification
In addition to billing and logo setup, OpenAI requires business verification to ensure only legitimate businesses advertise on ChatGPT. This is handled through Persona, OpenAI's trusted verification partner.


The verification process explains:
- Start running ads after verification — campaigns go live once approved
- Quick and easy — takes a few minutes with basic business info
- Secure review — handled via Persona for sanctions checks and policy compliance

You'll be asked to provide:
| Field | Notes |
|---|---|
| Registration number type | Select from country/province-specific options (e.g. Ontario Corporation Number, Federal Business Number) |
| Registration number value | Your actual business registration number |
| Business website | Auto-filled from your account |
| Business industry | Category selection (e.g. Professional Services, eCommerce) |
| Physical address | No PO boxes. Legal registered address can be marked as same as physical. |

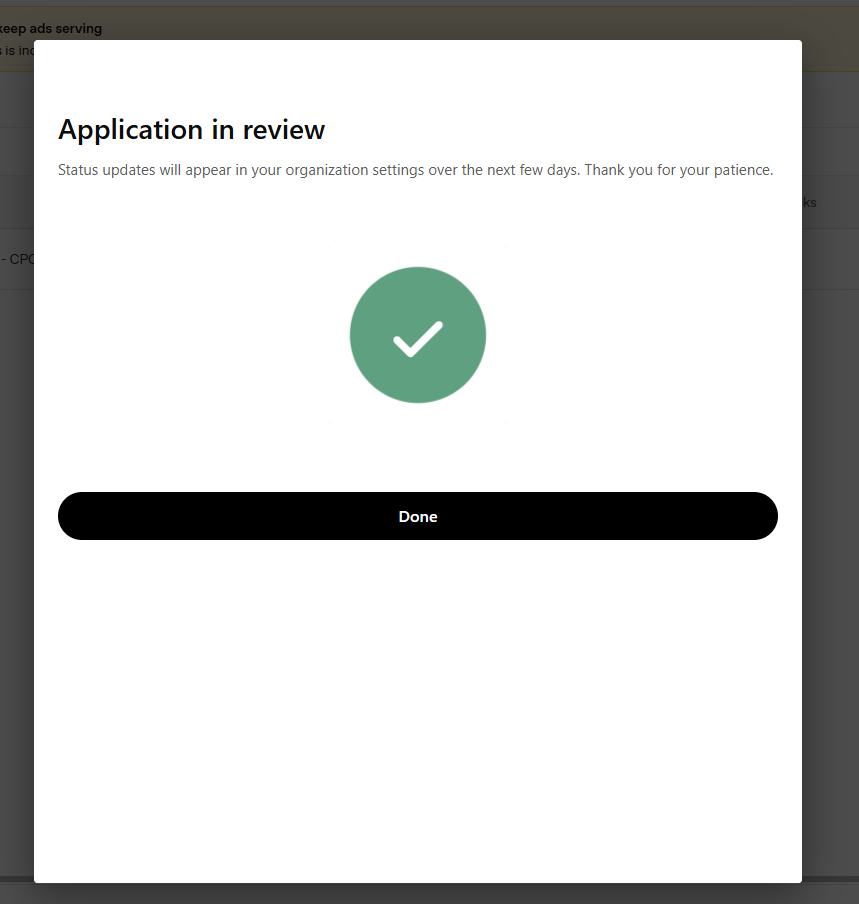
After submitting, you'll see an "Application in review" confirmation. Status updates will appear in your organization settings within a few business days. Once approved, your campaign will start serving ads automatically.
You're Ready to Advertise on ChatGPT
Setting up your first ChatGPT ad campaign takes less than 30 minutes. Here's a quick recap of the full process:
- Visit ads.openai.com and access Ads Manager Beta
- Create a campaign with a name, objective, location, and budget
- Set up your ad group with a max CPC bid and keyword hints
- Write your ad creative (headline, description, image, destination URL)
- Review and create your campaign
- Complete account setup: add billing info and upload your company logo
- Submit your business for verification via Persona
- Wait for approval — then watch your ads start serving in ChatGPT conversations
ChatGPT advertising is still in early beta, but the opportunity is significant — reaching users at the exact moment of decision in one of the world's fastest-growing AI platforms.